


Underfloor Heating General
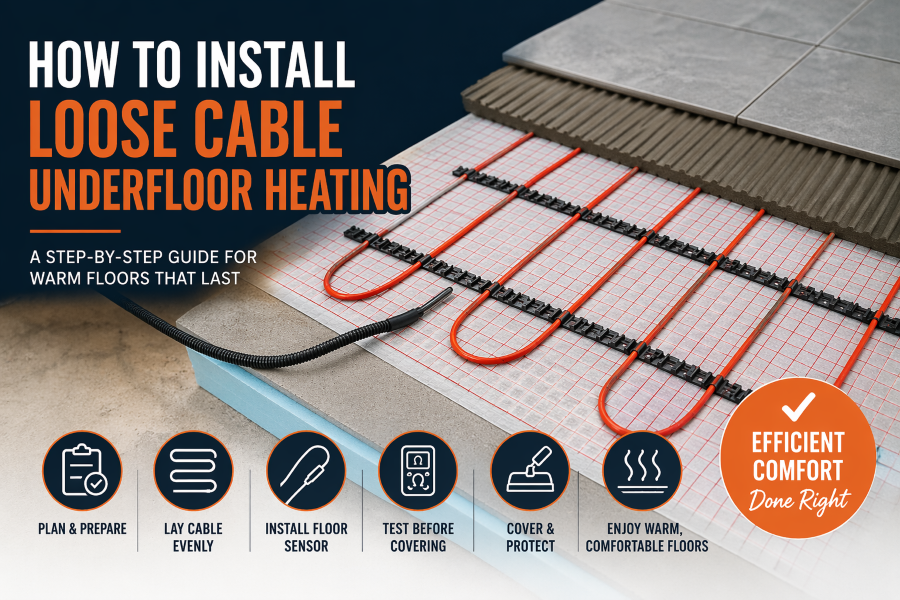
How to Install Loose Cable Underfloor Heating (The Right Way)
Posted on by Chris Thompson
06
Mar
Mar
🔧 Step-by-step: Laying loose UFH cable
1. Prepare the subfloor


- Surface must be clean, dry, and level
- Install insulation boards (very important for efficiency)
- Prime the surface if required (especially for screed/adhesive)
2. Plan your layout carefully
- Avoid fixed objects: toilets, cabinets, kitchen units
- Maintain consistent spacing (usually 50–100mm between runs)
- Never cross cables ❌
- Mark out your layout before you start
💡 Tip: Keep cables slightly closer together in colder zones (like near external walls)
3. Fix the cable in place


You have 3 main fixing methods:
- Fixing strips (best option) – pre-spaced clips for even layout
- Hot glue / tape – for small areas
- Mesh systems – if partially pre-mounted
Lay in a zig-zag pattern for even coverage.
4. Install the floor sensor
- Place it centrally between two cable runs
- Run inside a conduit (so it can be replaced later)
- Avoid touching the heating cable directly
5. Test before covering
- Use a multimeter to check resistance
- Compare with manufacturer specs
- Test again after installation
6. Cover the cable


7 Options:
- Self-levelling compound (SLC) → best for most installs
- Tile adhesive (for tiles only)
- Screed (for thicker builds)
Make sure cables are fully embedded and protected.
⚠️ Common mistakes to avoid
- ❌ Crossing or touching cables (causes overheating)
- ❌ Uneven spacing → hot/cold spots
- ❌ No insulation → massive heat loss
- ❌ Cutting the heating cable (only trim the cold tail)
- ❌ Skipping testing
👍 Pro tips
- Take photos before covering (helps if you drill later)
- Use a thermostat with floor probe for better control
- Plan cable spacing based on required wattage (not guesswork)
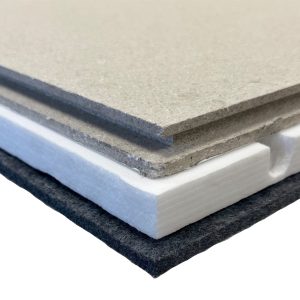
Is a decoupling mat a good idea when using loose cable?
Short answer: yes—using a decoupling mat with loose cable UFH is often a very good idea, especially under tiles. But it depends on your floor build-up and goals.
🧩 What a decoupling mat does


A decoupling mat (like Schluter-DITRA-HEAT or similar systems) acts as:
- Movement buffer → prevents tile cracking from subfloor movement
- Cable holder → keeps spacing perfectly consistent
- Stress relief layer → ideal over timber floors or mixed substrates
👍 When it’s a great idea
Use a decoupling mat if:
- You’re tiling over timber floors (plywood/OSB)
- The subfloor has potential movement or slight flex
- You want easy cable layout with no guesswork spacing
- You want a premium, belt-and-braces install
💡 In these cases, it’s often better than fixing strips.
🤔 When it’s not essential
You don’t strictly need it if:
- You have a solid concrete/screed subfloor
- The floor is already very stable
- You’re happy using fixing strips + self-leveller
In those cases, a decoupling mat is more of a nice upgrade than a necessity.
⚠️ Downsides to consider
- 💰 Cost – mats aren’t cheap
- 📏 Floor height – adds a few mm build-up
- 🔥 Slight thermal lag – tiny delay vs direct embed (usually negligible)
🔧 Best practice if you use one
- Fully bond the mat to the subfloor (no voids)
- Press the cable firmly into the channels (don’t force it)
- Still install a floor probe sensor between runs
- Tile directly on top using flexible adhesive
🧠 Honest verdict
- Timber floor + tiles → absolutely worth it 👍
- Concrete floor → optional upgrade
- DIY install → makes life MUCH easier